
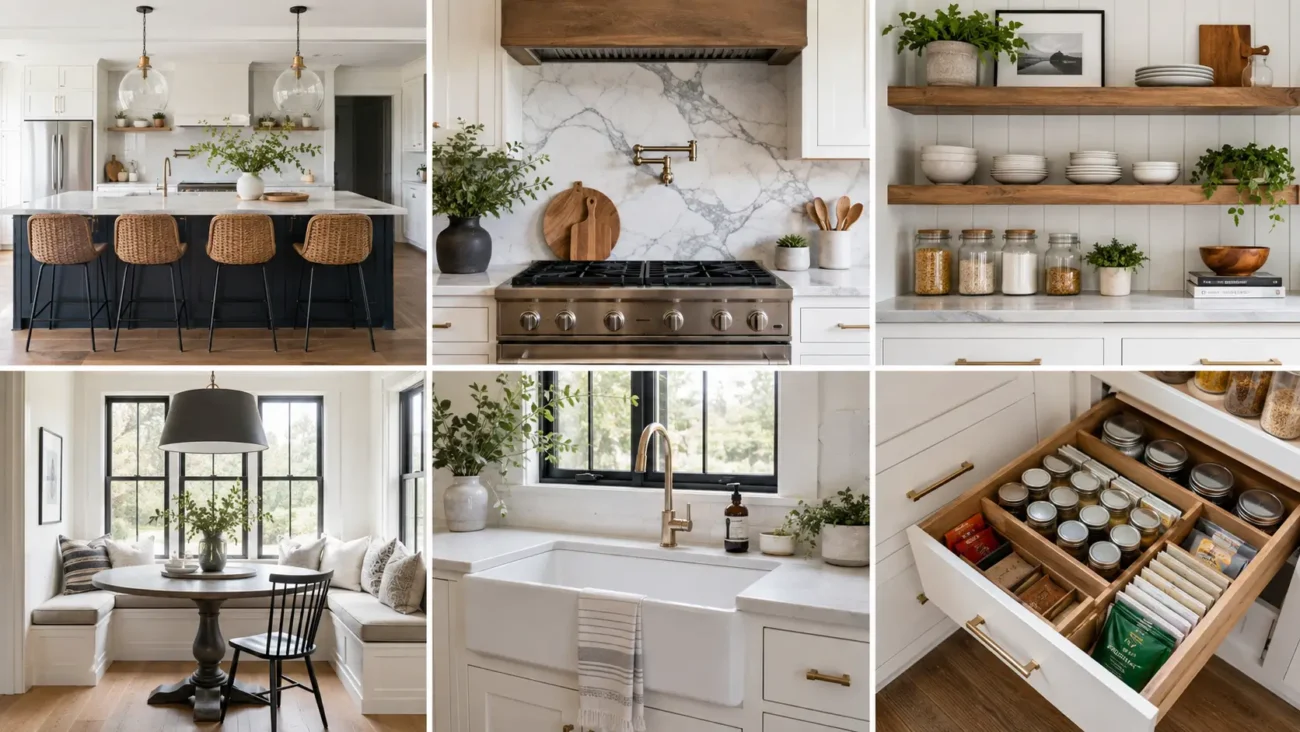
A thoughtful kitchen should make cooking, storing, serving, and gathering feel natural. The best kitchen ideas create interest through movement, hidden functions, warm materials, and carefully framed details instead of crowded counters or matching finishes everywhere.
The six concepts below explore sliding backsplash shutters, a rotating pantry drum, lift up appliance platforms, decorative cabinet cutouts, a concealed step plinth, and a pass through serving portal. Each can be adapted for compact rooms, open layouts, or larger kitchens while remaining practical, original, and easy to connect through one wood tone, paint family, metal finish, or stone surface.
Sliding Backsplash Shutters With Hidden Utility Zones
Sliding backsplash shutters add movement to the wall between the counter and upper cabinets while keeping useful tools close to the preparation area.
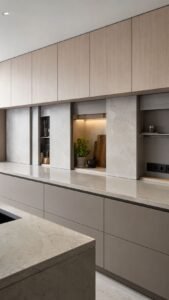
Slim panels can move sideways to reveal outlets, utensils, notes, or contrasting color, then close when the kitchen needs a quieter appearance. Use several manageable sections rather than one heavy panel across the entire work zone.
Hide a Utensil Rail Behind Warm Timber
Install a narrow rail for ladles, measuring cups, and strainers inside a recessed compartment, then cover it with a timber shutter that slides aside. A recessed grip keeps the front clean, while a deeper interior color makes the tools easy to see.
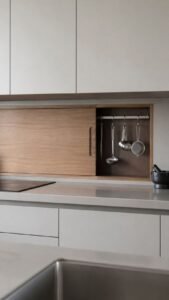
When closed, the warm wood becomes a calm background and protects the hanging pieces from splashes.
Reveal a Saturated Tile Pocket
Use one shutter to conceal a concentrated area of colorful tile behind the main preparation counter. Jade, persimmon, cool blue, or plum can add personality without covering the full backsplash.
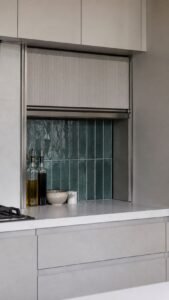
The pocket may hold oils, salt, and one bowl while the surrounding wall stays quiet. Opening it creates a strong decorative moment during cooking.
Create a Covered Outlet and Device Shelf
Build a shallow backsplash shelf for a phone, tablet, or timer, with outlets positioned safely at the back. A solid shutter can hide devices and cords when they are not needed.
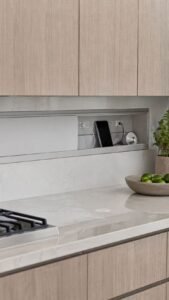
Add a narrow lower lip and a wipeable interior finish. This keeps recipes visible during cooking without allowing technology to control the permanent view.
Rotating Pantry Drum With Reachable Ingredient Storage
A rotating pantry drum uses a curved internal cabinet to bring dry ingredients forward instead of hiding them at the back of deep shelves.
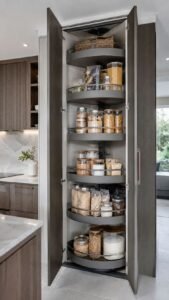
The outer doors can remain flat and simple, while the inside turns through organized zones for baking supplies, grains, snacks, and jars. Smooth bearings, adjustable shelves, and clear weight limits keep the drum easy to use.
Divide the Drum Into Vertical Ingredient Bays
Create four or five tall bays around the rotating center and assign each one a clear purpose. One can hold breakfast ingredients, another baking supplies, and another grains or pasta.
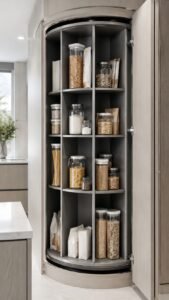
Adjustable shelves allow every bay to change with package sizes. A contrasting interior helps contents remain visible, while simple containers reduce visual confusion without forcing everything into identical jars.
Add Curved Rails for Bottles and Jars
Fit low curved rails along each shelf edge so bottles and jars stay secure while the drum turns. Timber rails add warmth, while powder coated metal creates a cleaner look.
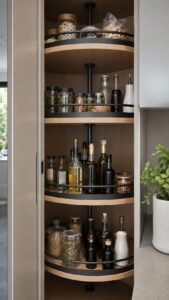
Keep daily items between waist and eye height and place lightweight backups above. The curved protection prevents containers from shifting into the mechanism.
Reserve One Bay for Serving Pieces
Use one section for platters, cake stands, pitchers, and special bowls that are awkward to stack in ordinary cupboards. Add vertical dividers for trays and a padded shelf for delicate pieces.
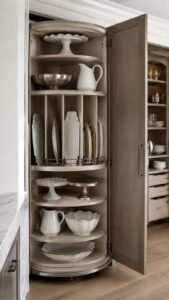
Position this bay so it can face the dining area when the drum turns. Serving items stay protected yet appear quickly when needed.
Lift Up Appliance Platforms With Clear Counter Space
Lift up appliance platforms allow heavier machines to rise from lower cabinets and stop at a comfortable working height. Mixers, processors, bread makers, or juicers can remain ready without occupying the main counter.
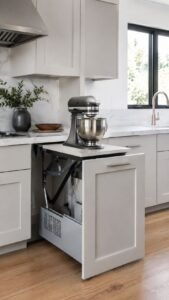
Each platform needs ventilation, safe power access, and enough clearance for the appliance to open and operate properly.
Raise a Mixer Beside the Baking Zone
Place a mixer lift beneath the counter closest to flour, bowls, trays, and measuring tools. When raised, the platform should sit level with the worktop so ingredients move easily between both surfaces.
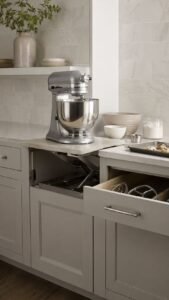
Store attachments in a fitted drawer nearby. A durable inset beneath the mixer protects the platform and makes scattered flour easier to clean.
Give the Toaster a Ventilated Morning Lift
Create a smaller lift for a toaster or sandwich press inside a cabinet away from curtains and delicate finishes. Perforated side panels improve airflow, while a heat resistant platform protects the interior.
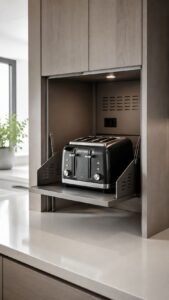
The appliance must remain fully exposed while operating and cool before lowering. This saves counter space without repeating a full beverage station.
Build a Flat Cover Above the Lowered Platform
Design a fitted cover that closes over the opening after the appliance lowers. It can match the countertop and become temporary preparation space, or match the cabinetry for a quieter effect.
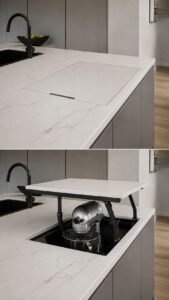
Add a recessed finger grip and secure stops so it cannot shift. The restored surface makes the mechanism feel fully integrated.
Decorative Cabinet Cutouts With Airy Heritage Detail
Decorative cabinet cutouts bring ventilation, shadow, and handcrafted character to selected doors without glass fronts or open shelving. The openings can be simple and geometric, and they work best where stored items do not need full protection from dust.
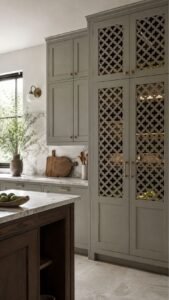
Use the cutouts sparingly across a pantry, vegetable cupboard, or upper cabinet so they feel like carefully chosen jewelry.
Repeat Elongated Slots on One Tall Door
Cut a vertical group of elongated openings into one tall door, changing their lengths slightly as they move upward. A darker interior or fine mesh backing makes the pattern clearer while keeping contents discreet.
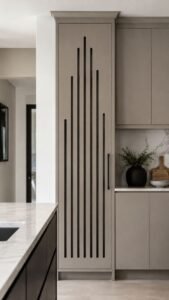
The long shapes visually increase cabinet height and provide airflow for baskets, linens, or dry produce. Keep nearby doors solid.
Scatter Offset Circles Across a Small Front
Use several round cutouts across a compact upper door, placing them in an uneven but balanced arrangement. Vary the sizes and leave generous wood between every opening.
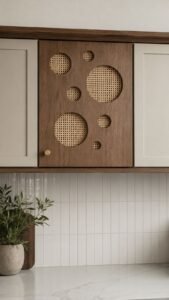
Back the circles with woven cane, colored mesh, or deep paint. The shifting dots feel playful without turning the panel into a strict grid.
Frame One Abstract Keyhole Shape
Create one larger cutout with a rounded top and narrow lower opening, then surround it with a broad timber frame. The form can reveal a contrasting interior panel rather than cupboard contents.
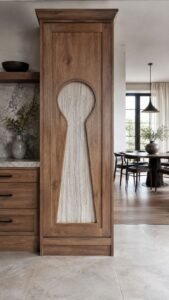
Place it near the end of a cabinet run where it can be seen from the dining area. Its scale creates a memorable handcrafted mark.
Concealed Step Plinth With Safe Upper Cabinet Access
A concealed step plinth turns the lowest section beneath the cabinets into a stable platform that slides forward when someone needs a high shelf. Unlike a loose stool, it remains stored in one predictable place and disappears when closed.
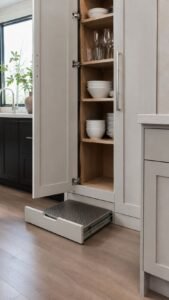
The step needs strong runners, a slip resistant surface, and a locking position. It works especially well beneath a pantry or dish cabinet used regularly.
Pull Out a Full Width Timber Step
Build a broad timber platform that slides from beneath one cabinet section and locks before use. The depth should support the full foot, while shallow grip grooves or a nonslip insert improve safety.
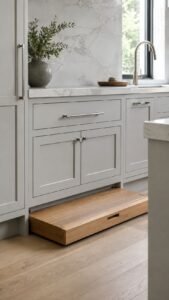
A recessed hand opening makes it easy to pull forward. When closed, the timber edge can remain as a warm line beneath painted cabinetry.
Add a Small Safety Light Under the Edge
Fit a low warm light beneath the front edge so the step is visible during early mornings or evenings. It can switch on when the platform opens and turn off when it closes.
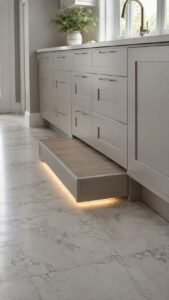
Keep the source concealed so it washes across the floor rather than shining upward. This improves visibility without lighting the entire cabinet base.
Store Flat Items Behind the Step
Use the remaining depth behind the platform for a narrow compartment holding reusable bags, placemats, cooling racks, or slim trays. A divider keeps the items away from the runners and allows the step to move freely.
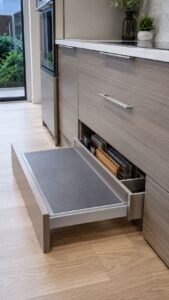
This uses space that might otherwise remain empty. Keep the contents lightweight for easy operation.
Pass Through Serving Portal With a Flexible Dining Connection
A pass through serving portal creates a direct connection between kitchen and dining without opening the entire wall. The framed opening can support plating, conversation, and casual meals while preserving cabinet space on both sides.
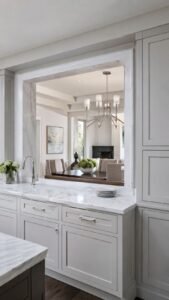
A sliding panel can close the portal when cooking becomes busy, and a fitted shelf can appear only during serving. Repeat the kitchen timber, stone, or paint so the feature feels architectural.
Slide Out a Stone Serving Shelf
Fit a stone or sealed timber shelf inside the lower edge and allow it to extend slightly into the dining side. It can hold plated dishes, drinks, or a small buffet arrangement.

Hidden supports keep the underside clean, while a raised rear edge protects the wall. After the meal, the shelf slides back into the frame.
Close the Portal With a Painted Art Panel
Use a sliding panel on the dining side and treat its visible face like wall art. A large abstract color field, carved relief, or framed textile can add character when the kitchen is hidden.
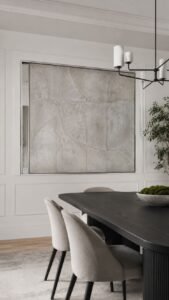
The kitchen facing side should be washable. This allows the portal to change from a serving feature into a decorative surface.
Build a Plate Landing Ledge Inside the Frame
Add a narrow ledge along one side where clean plates can wait before serving and used dishes can pause before returning to the sink. Keep it separate from the main opening so conversation space remains clear.
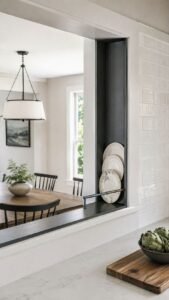
A slim rail prevents slipping, while a contrasting interior color makes the small zone easy to identify.
Let Kitchen Ideas Grow From Movement and Daily Habits
Original kitchen ideas become more useful when they respond to the way people prepare food, reach storage, manage appliances, and serve meals. Sliding backsplash shutters hide busy utilities, while a rotating pantry drum brings ingredients forward. Lift up platforms clear the counter, and cabinet cutouts add handcrafted ventilation. A concealed step plinth improves access, while a serving portal connects cooking with dining. Choose the features that solve real problems, then link them through repeated wood, stone, paint, or metal. You can also explore related articles about kitchen lighting, cabinet colors, pantry organization, small kitchen layouts, countertop materials, dining areas, appliance storage, and backsplash styling.
