
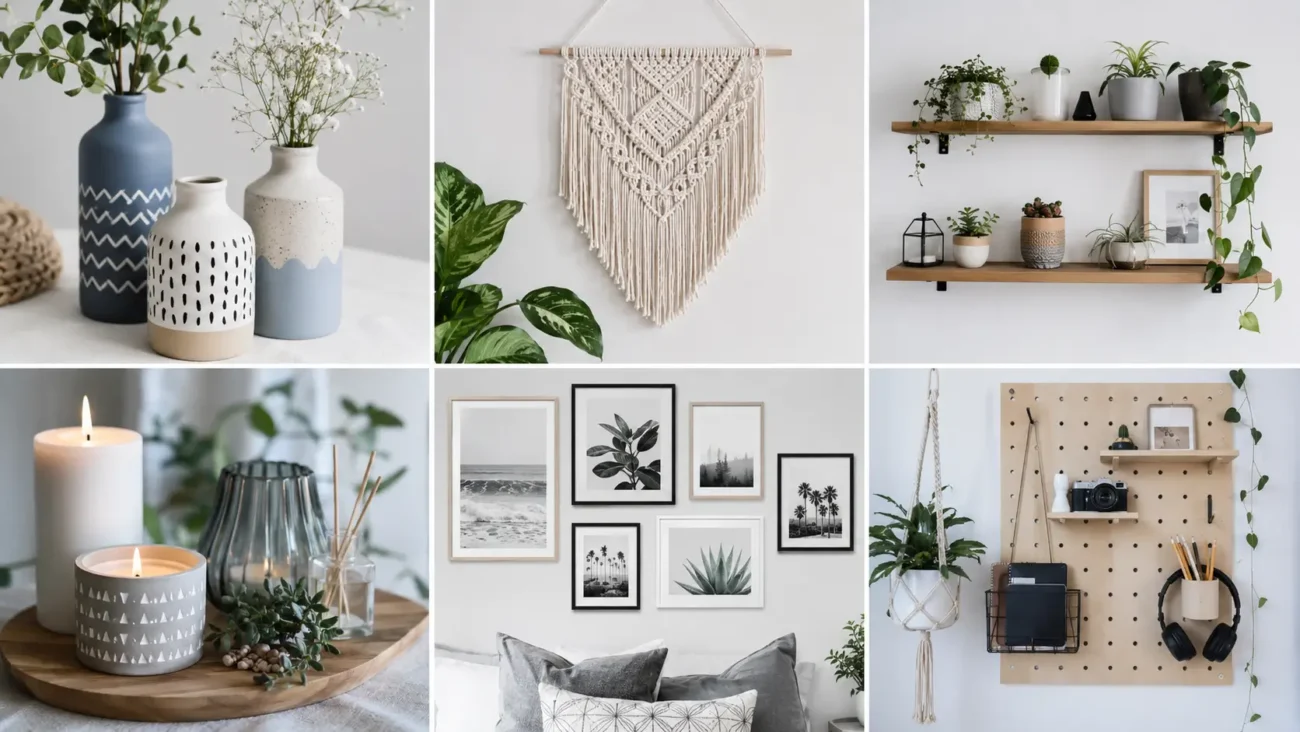
DIY room decor feels most successful when every project solves a visual or practical problem instead of adding another object to an already busy space. A handmade feature can bring color to a blank wall, improve storage, soften lighting, or turn an ignored corner into part of the room.
The ideas below focus on paper pulp relief panels, fabric wrapped organizer boards, painted door portals, translucent lantern clusters, sculptural display pedestals, and rolling under bed drawers. Each project can be adjusted for a bedroom, study area, apartment, or shared room without copying a showroom. Careful proportions, limited colors, and neat finishing help simple materials look intentional rather than temporary.
Paper Pulp Relief Panels With Hand Shaped Texture
Paper pulp relief panels create sculptural wall decor from recycled paper, water, adhesive, and shallow forms. Their raised surfaces add interest without requiring framed prints or permanent construction.
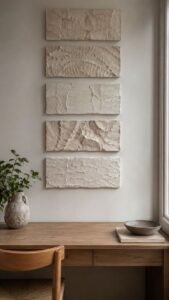
A group of three or five panels can fill a narrow wall, sit above a desk, or balance an empty corner. Use one paint family across the collection so the handmade textures remain the main feature.
Shape Crescent Grooves Across Square Panels
Press paper pulp into shallow square molds, then carve broad crescent grooves before the material fully dries. Change the direction on every panel so the curves appear to continue across the wall.
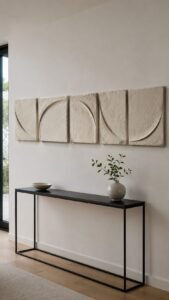
Paint the finished pieces in chalky cream, clay, or muted green, then mount them with removable strips when the panels are light enough.
Build Seedpod Medallions With Rounded Forms
Create circular pulp pieces with one raised oval in the center and several smaller forms surrounding it. Keep the shapes smooth and widely spaced so the result feels sculptural rather than floral.
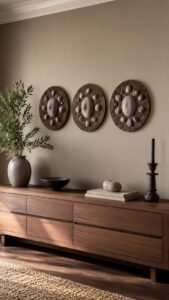
A deep cocoa base with lighter raised sections creates strong shadow, while a single color gives a quieter finish for a restful room.
Arrange Ripple Blocks in an Uneven Grid
Make several small rectangular panels and press wide ripples into their surfaces using the edge of a spoon or curved tool. Hang the blocks with different gaps instead of forming a perfect grid.
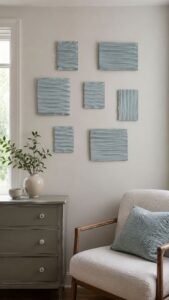
The varied spacing creates movement, while matching paint connects the collection. This project works especially well above a compact dresser or reading chair.
Fabric Wrapped Organizer Boards With Soft Practical Detail
Fabric wrapped organizer boards combine decoration with a place for notes, accessories, photographs, and small daily items. Unlike a crowded corkboard, each panel can have one defined purpose and a clean fabric surface.
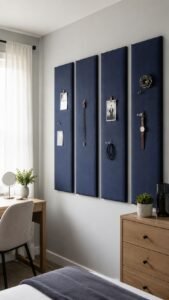
Use sturdy board, thin batting, and tightly pulled fabric for a smooth finish. Mount several narrow shapes vertically to make the room feel taller.
Add a Padded Ribbon Rail for Small Keepsakes
Wrap a tall board in plain fabric, then stretch three wide ribbons across it at different heights. Secure the ribbon ends behind the panel and leave enough tension to hold postcards, small prints, or fabric swatches.
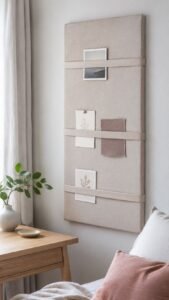
Choosing ribbon close to the fabric color keeps the display calm even when the objects change through the season.
Sew a Deep Pocket for Charging Essentials
Create one broad fabric pocket across the lower third of a wrapped panel. Add a small opening at the side for a charging cable, then use the pocket for a phone, headphones, or reading glasses.
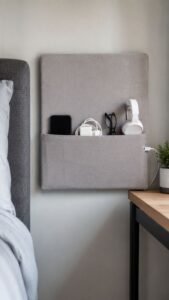
Position the board beside a bed or desk so the storage feels connected to an everyday routine instead of becoming decorative clutter.
Frame One Rotating Composition With Cord
Attach a thick cord in a loose rectangular outline across the board, securing it only at the corners. Small clips can hold one photograph, a handwritten note, and a tiny artwork inside the shape.
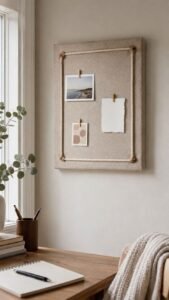
Leaving the remaining fabric empty gives the arrangement focus and makes it easy to refresh without replacing the complete panel.
Painted Door Portal With Color Beyond the Walls
A painted door portal turns an overlooked surface into a strong room feature without covering every wall. The door, trim, and a small area around the frame can form one graphic composition that changes how the entrance feels.
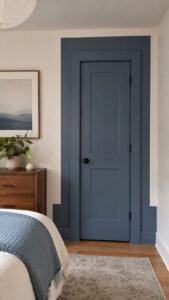
Removable paintable film can make the idea suitable for temporary spaces. Choose colors that already appear in bedding, rugs, or artwork.
Extend a Rounded Frame Beyond the Trim
Paint the door in a quiet base shade, then add a wide rounded frame that continues several inches onto the surrounding wall. The enlarged outline makes the doorway appear more architectural.
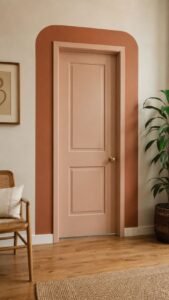
A rust frame around a pale peach door feels warm, while cobalt around soft gray creates a sharper and more energetic entrance.
Divide the Door Into a Simple Landscape
Use three flat color sections to create an abstract horizon across the door. A darker tone can sit at the bottom, a brighter band through the middle, and a pale field above. Keep the edges crisp and avoid small illustrations.
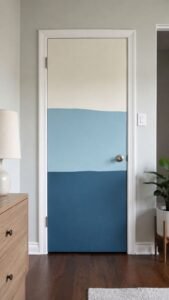
The large shapes make the project visible from across the room and easier to complete neatly.
Hide a Useful Panel on the Reverse Side
Paint the room facing side as the decorative feature, then use the reverse for practical organization. Add a slim rail, two fabric loops, and one shallow pouch for a robe, tote bag, or frequently used accessories.
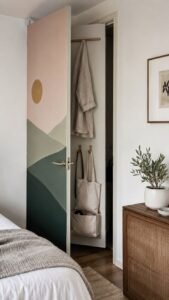
Keeping this storage behind the open door protects the main view and gives the project more value in a small room.
Translucent Lantern Cluster With Gentle Layered Light
A translucent lantern cluster brings softness overhead or into an empty corner using vellum, tracing paper, lightweight hoops, and low heat LED lights. Different shapes can hang together without matching exactly.
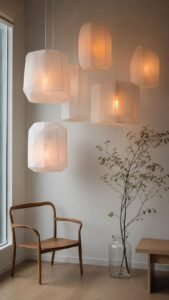
Limit the cluster to one neutral and one accent color so the light remains relaxing. Every shade should leave enough open space for safe air circulation.
Make a Wide Drum Halo Above a Table
Join two lightweight hoops with narrow supports, then wrap them in translucent paper to create a broad drum shade. Leave a slim opening along the lower edge so light can escape downward.
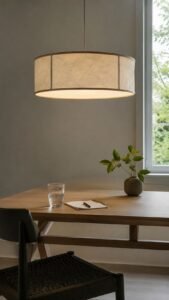
Hanging the shape above a desk or small table gives the area a clear center and reduces the need for several decorative objects.
Stack Two Capsules at Different Heights
Form two narrow rounded shades, one longer than the other, and suspend them with a visible gap between them. Use pale amber paper for the lower capsule and soft white for the upper one.
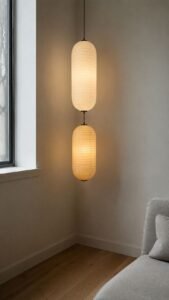
The stacked arrangement adds height to a corner while keeping the floor clear, making it useful where furniture space is limited.
Gather Three Small Lanterns Near a Window
Create three compact lanterns in related shapes and hang them at staggered heights near a window corner. They can remain unlit during the day and glow softly in the evening.
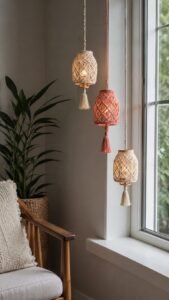
Use one dusty coral lantern among two cream pieces for controlled color. Keep them clear of curtains and use only lightweight LED components.
Sculptural Display Pedestals From Simple Wood Forms
Small display pedestals give plants, books, lamps, and handmade objects a deliberate place instead of scattering them across furniture. They can be built from wood circles, short posts, sturdy boxes, and paint.
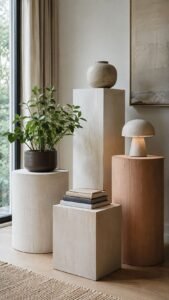
Varying the heights creates a collected arrangement, but each pedestal should remain stable and sized for the object it supports.
Build a Low Disc Stand for One Plant
Attach a wide wooden circle to a short central support and a slightly smaller base. Sand every edge until smooth, then paint the stand in a saturated color that contrasts with the plant pot.
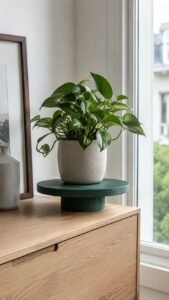
Keeping the pedestal low makes it suitable beside a window or at the end of a dresser without blocking light.
Stack Two Offset Blocks for Books
Join two strong rectangular boxes with the upper block shifted slightly to one side. Cover the form with a smooth painted finish, then place a short stack of books on top and one decorative object in the open lower section.
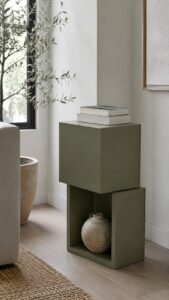
The offset silhouette gives the pedestal character while still providing useful display space.
Turn a Tall Column Into a Lamp Base
Construct a narrow hollow column from lightweight wood panels and place it in a corner that needs height. Set a small lamp on top and route the cord through an opening near the back.
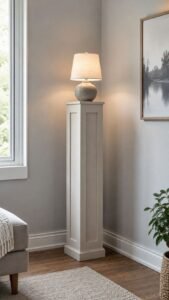
Painting the column the same shade as the wall makes the lamp appear elevated, while a contrasting color turns it into a focal point.
Rolling Under Bed Drawer With a Decorative Front
A rolling under bed drawer uses hidden space while adding a finished detail to the room. Build a shallow box that clears the bed frame, add small casters, and give the visible front a decorative treatment.
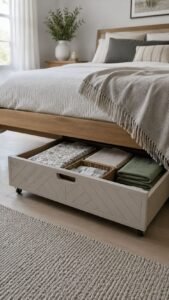
The drawer can hold supplies, textiles, or technology that would otherwise remain in sight. A recessed pull keeps the face smooth.
Create Divided Storage for Creative Supplies
Fit removable dividers inside the drawer to separate paper, paint, tools, and unfinished projects. Line the base with washable material so spills are easier to manage.
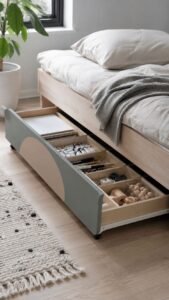
A painted front with one oversized curved shape can connect the drawer to the room palette and make it feel like part of the furniture.
Store Seasonal Textiles in Breathable Sections
Divide the drawer into two broad areas for blankets, cushion covers, and lighter seasonal bedding. Small ventilation openings along the back help air move while staying hidden from view.
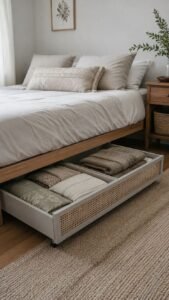
Finish the front with woven cane cloth or perforated board, then frame it neatly with painted timber for a warm decorative texture.
Add a Night Charging Compartment
Reserve one section for a power strip, tablet, game controller, or other devices that create visible cable clutter. Route one cord through the rear and add a heat safe divider around the electrical area.

The drawer can roll out when devices are needed and disappear again, leaving the bedside area calmer and easier to clean.
Make DIY Room Decor Look Collected Instead of Homemade
The best DIY room decor combines imagination with careful finishing and a clear purpose. Paper pulp panels add handmade relief, while fabric organizer boards bring softness and useful storage. A painted door portal changes the entrance, and translucent lanterns shape the evening light. Sculptural pedestals create intentional display points, while a rolling under bed drawer hides supplies behind a decorative front. Choose one or two projects that answer a real need, then repeat a limited palette so the room feels connected. You can also explore related articles about small room storage, wall decor, bedroom lighting, renter friendly updates, desk organization, color combinations, and budget decorating.
