
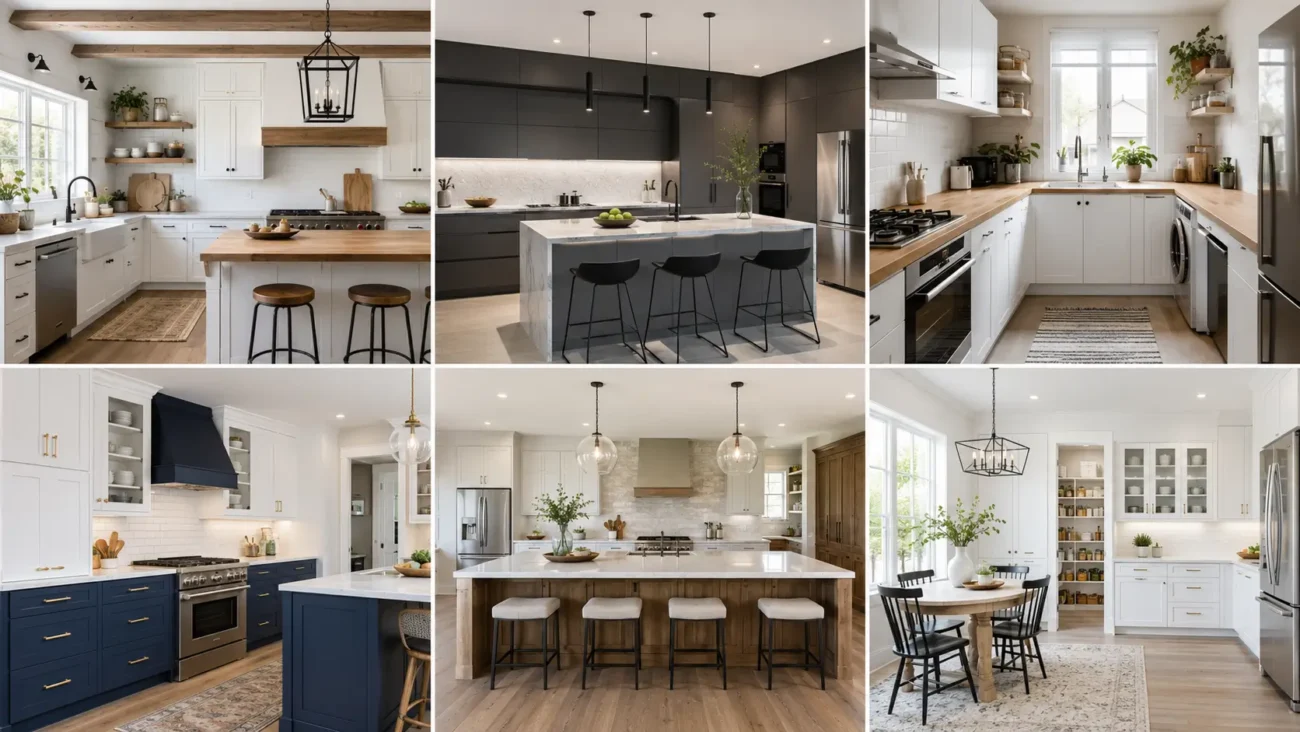
A well planned kitchen should support cooking, storage, conversation, serving, and cleanup without allowing every practical object to remain visible. The most interesting spaces combine useful features with materials and colors that feel connected to the rest of the home. Natural wood, warm neutrals, deep accent shades, focused lighting, and concealed appliances can make a kitchen feel welcoming rather than purely functional.
The ideas below explore a breakfast cabinet, a framed cooking niche, a preparation peninsula, a pantry passage, a sink runway, and a ceiling shelf canopy. Each concept includes three detailed ways to improve the layout while creating a distinctive look. Choose the features that suit your routines, available space, and storage needs instead of trying to place every idea inside one room.
Breakfast Cabinet That Opens Into a Complete Morning Station
A breakfast cabinet gathers the coffee maker, toaster, mugs, cereals, and daily dishes behind doors that can close after the morning routine. It prevents small appliances from filling the main counter while creating a dedicated place for simple meals and drinks. Pocket doors are especially useful because they slide away instead of blocking nearby movement.
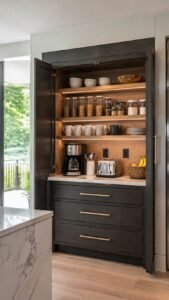
The interior can use a contrasting color, patterned surface, or warm wood to make opening the cabinet feel like revealing a separate room. Plan electrical outlets, ventilation, lighting, and shelf heights before choosing the final cabinet size.
Slide the Doors Into Hidden Side Pockets
Choose cabinet doors that disappear into narrow pockets on both sides of the opening. This allows the station to remain fully accessible while someone prepares breakfast and prevents open doors from narrowing the walkway. Use sturdy hardware that can support frequent movement, and leave enough interior depth for appliances to sit safely behind the closed fronts.
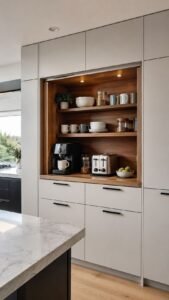
Matching the doors to the surrounding cabinetry keeps the station quiet when closed, while a colorful interior adds personality when it is being used.
Arrange Mugs and Bowls on a Shallow Upper Rail
Install a shallow shelf across the upper interior for mugs, breakfast bowls, and small plates. Keeping these items above the appliances reduces unnecessary movement between different cabinets during busy mornings.
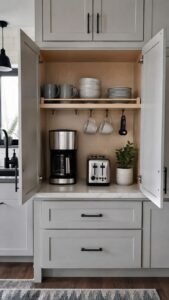
A low raised edge can prevent dishes from sliding, while hooks beneath the shelf can hold measuring spoons or lightweight cups. Choose pieces in related colors so the open station looks orderly even when the doors remain open for several hours.
Add a Pullout Surface Below the Appliances
Fit a strong pullout shelf beneath the coffee maker and toaster to create temporary preparation space. It can hold a cutting board, bread basket, or cups without occupying the main worktop.
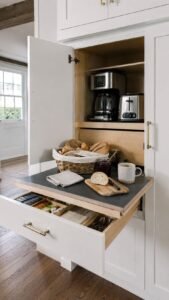
The shelf should lock securely when extended and slide completely inside before the doors close. A heat resistant surface will make the station safer and easier to clean, while a nearby drawer can store tea, coffee, napkins, and breakfast utensils.
Framed Cooktop Niche With a Strong Architectural Presence
A framed cooktop niche turns the main cooking area into a clear focal point without relying on oversized decorations. The niche can project slightly from the cabinet wall and contain the cooktop, hood, backsplash, and narrow storage ledges within one carefully defined shape. Plaster, stone, tile, painted wood, or metal can give the frame a different character.
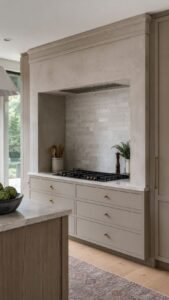
Keep the surrounding cabinetry simpler so the niche receives attention. This arrangement works especially well when the kitchen needs one memorable feature that still supports ventilation, lighting, and everyday cooking.
Shape a Soft Arch Around the Cooking Zone
Create a broad arch above the cooktop and continue the sides down toward the counter. The curved outline softens a room filled with rectangular cabinets and appliances. Finish the frame in warm plaster, muted clay, or a slightly deeper version of the wall color.
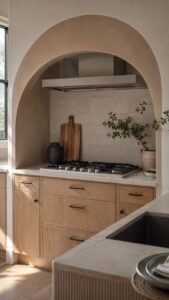
The arch should remain wide enough for comfortable cooking and proper hood clearance. A simple backsplash inside the niche will allow the shape to remain more noticeable than the individual materials.
Line the Interior With Vertical Handmade Tile
Use narrow handmade tiles inside the cooktop niche and install them vertically to draw the eye upward. Small variations in glaze will add depth without requiring a complicated pattern. Choose a color that contrasts gently with the outer frame, such as olive tile inside a cream surround or smoky blue inside warm beige.
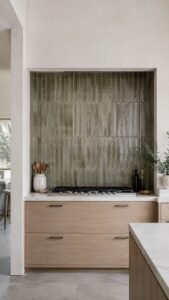
Continue the tile behind the full cooking surface so splashes are easier to clean and the niche appears complete rather than decorative.
Build Slim Seasoning Ledges Into Both Sides
Add narrow recessed ledges along the inner sides of the niche for oils, salt, and frequently used seasonings. Keep them shallow enough that containers cannot interfere with larger pots or heat. A small rail along each front edge will improve safety and keep bottles aligned.
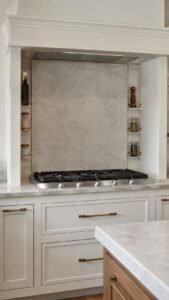
Limit the display to everyday cooking essentials, while backups remain inside a drawer. This arrangement makes ingredients easy to reach without covering the main counter with loose containers.
Preparation Peninsula With a Curved Social Edge
A preparation peninsula can separate cooking from dining while remaining connected to the room. Unlike a large central island, it attaches to one wall or cabinet run and can fit spaces where circulation is limited. A curved outer edge makes movement around the peninsula easier and creates a softer place for stools.
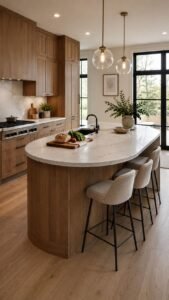
The inner side can support chopping, baking, or serving, while the outer side provides seating and display. Use the countertop shape, storage arrangement, and lighting to make the peninsula feel like an intentional piece of furniture.
Round the Outer Corner for Easier Movement
Shape the exposed corner into a generous curve rather than a sharp angle. This improves the path between the kitchen and nearby dining or living space, especially when several people move through the room.
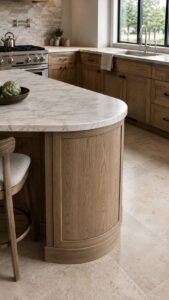
Continue the countertop material around the curve for a smooth finish, then follow the shape with the base cabinetry below. A rounded end also gives the peninsula a more distinctive silhouette without requiring decorative objects or complicated color changes.
Place Baking Drawers on the Working Side
Organize deep drawers beneath the inner side for mixing bowls, measuring tools, baking trays, and dry ingredients. Grouping these supplies near the preparation surface reduces movement across the kitchen. Use adjustable dividers so the drawers can change as equipment changes.
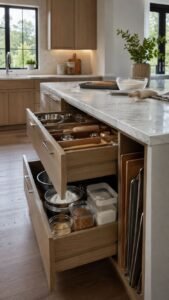
A narrow vertical compartment at one end can hold trays and cutting boards upright, making them easier to remove without lifting a heavy stack from a low cabinet.
Create a Lower Timber Perch for Seating
Drop the outer seating surface slightly below the main counter and finish it in warm timber. The lower height creates a more comfortable place for casual meals, homework, or conversation while someone cooks.
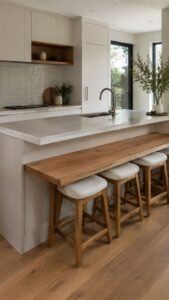
It also separates serving space from food preparation without building a wall. Choose stools that can slide fully underneath and leave enough distance between seats so people can sit comfortably without blocking the main kitchen route.
Pantry Passage That Connects Storage With Daily Movement
A pantry passage transforms the route between the kitchen and another room into useful storage. Tall cabinets can line one side or both sides while leaving a clear walkway through the center. This layout works well near a garage entrance, dining room, utility room, or back door because groceries can move directly into storage.
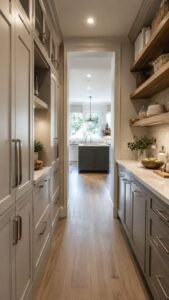
Combining closed cupboards, open shelves, and counter space keeps the passage practical without making it feel like a narrow warehouse. Good lighting and consistent finishes help the area feel connected to the main kitchen.
Place Grocery Storage Closest to the Entry
Reserve the cabinets nearest the household entrance for packaged food, drinks, and reusable shopping bags. This allows groceries to be stored before they travel through the entire kitchen. Use adjustable shelves for changing package sizes and deep drawers for heavier items.
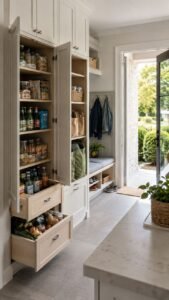
Clear labels inside the doors can guide family members without becoming part of the visible decor. Keeping the highest use supplies at waist and eye level will make the passage faster and easier to manage.
Build a Counter for Unpacking and Small Tasks
Include a short counter between tall cabinets as a landing place for grocery bags, parcels, lunch boxes, or serving dishes. Add an outlet so the surface can support a small appliance when extra preparation space is needed.
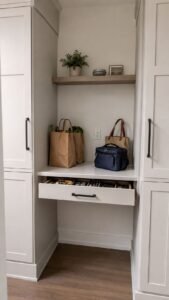
One shallow drawer can hold scissors, labels, pens, and reusable clips. Keep the wall above relatively open or add one narrow shelf, allowing the counter to remain useful rather than becoming a permanent decorative display.
Finish the Far End With a Display Cabinet
Place a glass fronted or open cabinet at the end of the passage to create a visual destination. Use it for serving bowls, cookbooks, pottery, or glassware rather than everyday food packages.
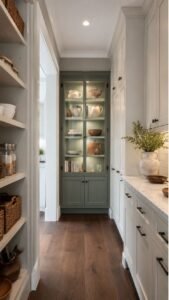
A painted interior or small cabinet light can make the display feel warm and intentional. This focal point draws attention through the passage and prevents the tall storage on both sides from making the area feel overly enclosed.
Sink Runway With Organized Washing and Preparation Zones
A sink runway extends practical features along the counter instead of concentrating everything around the basin. The arrangement can include a preparation board, drying surface, compost opening, soap storage, and concealed waste drawers in a continuous line.
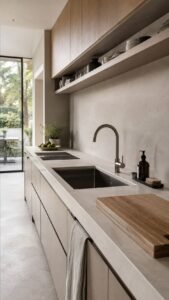
This makes washing produce, preparing food, and cleaning dishes easier because every task has a nearby place. The runway can be created with a long sink system or with carefully fitted accessories around a standard basin. Choose durable materials and keep the visible sections simple so the area stays calm.
Fit a Sliding Board Over Part of the Sink
Use a cutting board designed to rest securely on the sink edges and slide from one side to the other. It creates extra preparation space while allowing scraps or rinsed produce to move directly into the basin.
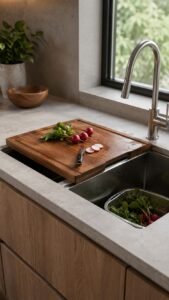
Select a board made from durable sealed timber or another food safe material. Store it vertically in a nearby cabinet when the full sink is needed, and make sure it can be removed easily for regular cleaning and drying.
Add a Fluted Drain Surface Beside the Basin
Extend the counter beside the sink with shallow grooves that direct water back toward the basin. This creates a discreet drying area without adding a separate plastic rack. The grooves can be carved into stone or formed within a fitted metal insert.
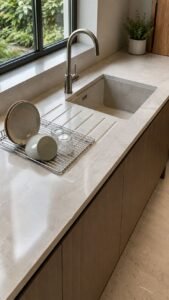
Use a movable rack above the surface when drying several dishes, then remove it to restore an open counter. The integrated detail keeps the washing area practical while preserving a cleaner visual line.
Divide Waste and Cleaning Supplies Below
Organize the base cabinets beneath the runway into separate sections for waste, recycling, compost, and cleaning products. Pullout bins make each category easier to reach, while a sealed container controls compost odor.
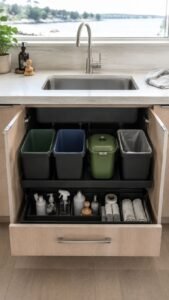
Place detergents in a divided drawer or removable caddy so leaks are easier to manage. Keeping these supplies directly below the sink supports faster cleanup and prevents bottles, brushes, and cloths from collecting around the faucet.
Ceiling Shelf Canopy That Uses Height Without Heavy Cabinets
A ceiling shelf canopy introduces storage and character above an island, table, or open preparation zone without covering the walls with more cabinetry. The structure can hang from the ceiling using slim supports and hold lightweight cookware, serving pieces, plants, or lighting.
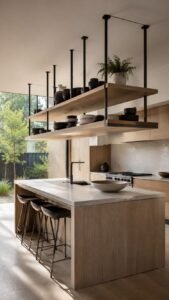
It should remain high enough to preserve open sightlines and avoid interfering with conversation. Timber, painted metal, or a combination of both can connect the canopy to cabinets and fixtures elsewhere in the kitchen. Careful editing is important because every stored object will remain visible.
Suspend One Open Timber Frame Above the Island
Build a simple rectangular timber frame that follows the proportions of the island below. Suspend it with narrow supports and keep the lower edge well above head height. One or two interior shelves can hold lightweight bowls, baskets, or decorative serving pieces.
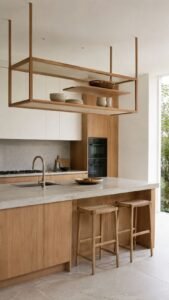
Leave several sections empty so the frame does not appear overloaded. Repeating the same timber on stools or cabinet handles will help the overhead structure feel integrated rather than added later.
Weave Task Lighting Through the Structure
Install small directional lights or a slim light bar within the canopy instead of hanging separate pendants below it. This keeps the lighting close to the preparation surface while preserving a clean outline.
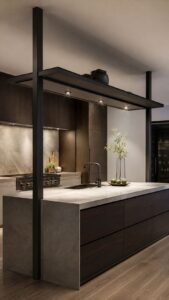
Aim the fixtures toward working zones and use warm bulbs that flatter food and natural materials. Conceal wiring inside the supports where possible, and include dimming control so the canopy can provide bright task light or softer evening illumination.
Reserve One End for Trailing Greenery
Place a narrow planter at one end of the canopy and choose lightweight trailing plants that tolerate the available kitchen light. Keep the planting away from the cooktop and areas exposed to heavy steam or grease.
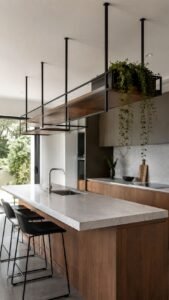
A removable liner will make watering safer, while a small hidden tray protects the timber or metal below. Limiting greenery to one side creates a softer edge without turning the entire overhead structure into a dense hanging garden.
Let the Kitchen Support Every Part of Daily Life
A memorable kitchen becomes easier to use when each feature answers a real routine. A breakfast cabinet creates an organized start to the day, while a framed cooktop niche gives cooking a strong visual center. A curved peninsula combines preparation with conversation, and a pantry passage turns circulation space into practical storage. A sink runway improves washing and cleanup, while a ceiling shelf canopy brings function and character overhead. Choose the concepts that fit the available space, then connect them through repeated wood, color, metal, or stone. You can also explore related articles about small kitchen layouts, cabinet colors, pantry organization, kitchen lighting, countertop styling, dining areas, backsplash ideas, and storage solutions to complete the design.
